
I've tested a lot of putters over the years. Scottys, Odysseys, Pings, Bettenardis, you name it, I've probably rolled a…

If you've ever stood over a pitch shot and felt like your wedge was working against you, the ball jumping…

But after spending several weeks putting the 0311 P Gen 8 irons through their paces, and getting my hands on…

I've tested a lot of putters over the years, blades, mallets, half-mallets, face-balanced, toe-hang, you name it. And if there's…

If you've been paying attention to the putter world over the last few years, you've probably noticed something: LAB Golf…

I'll be straight with you, when a wedge lands on my desk from a brand that most weekend golfers have…

I’ll level with you: Callaway’s latest drop met my standard eye-roll. A decade of testing hundreds of clubs has turned…

Callaway announcing another game-improvement iron family? I’ll admit, my initial reaction was a massive eye-roll. How many different ways can…

I've tested enough drivers over the past decade to fill a small warehouse, and I've heard every marketing promise imaginable.…

When Titleist announced they was launching the TSR driver lineup, I'll admit I rolled my eyes a bit. Another year,…

It took roughly 40 rounds and three months of testing to change my mind, but the Titleist TSR3 is the…

When TaylorMade announced the 10k MOI milestone, I rolled my eyes. I expected hype, not performance. But after three weeks…

I approached TaylorMade's announcement regarding the 10,000 MOI barrier with skepticism, dismissing it as typical marketing hyperbole. However, after extensive…

I approached TaylorMade's announcement regarding the 10,000 MOI barrier with skepticism, dismissing it as typical marketing hyperbole. However, after extensive…

I must confess that I was initially skeptical of TaylorMade’s claim regarding the 10,000 g/cm² MOI on the Qi10 Max,…

Skeptical about 'magic' cures for your slice? So was I. But after ten years of testing gear, the Ping G430…

With over two decades of experience on the course, I’ve always held a healthy skepticism regarding the low-spin driver category.…

I wasn't looking for an upgrade. My G425 Max had served me well for two seasons, and I was perfectly…

Mizuno irons have been my go-to for years, but I admit I’ve been missing out on their wedges. That changed…

I've always been a bit skeptical of PXG. The aggressive marketing, the premium pricing, the bold claims. But after spending…

I'll be straightforward with you. I've tested more drivers than I can count over the past decade, and most of…

First off, you'll notice the Cobra DarkSpeed Max Driver looks different from what Cobra's done before. They've gone with a…

The Callaway Paradym driver has some interesting things going on. You know how most drivers feel like you're swinging a…

Let me tell you about the Callaway AI Smoke Max D Driver, and trust me, this club has some interesting…

I was getting tired of the AI marketing hype in golf equipment. Every manufacturer seemed to be slapping "AI" on…

The Newport 2.5 felt different right away. A blade putter is basically the classic, simple putter shape, think of a…

After testing dozens of sets from the big names like Callaway, TaylorMade, and Titleist, I figured these newer companies were…

I've been playing golf for over two decades, and I thought I'd seen every "groundbreaking" fairway wood claim imaginable. So…

Performance Golf uses what they call "Dual Roll Technology," which basically means the face has two different curves built into…

When the Callaway Strata set arrived at my door, I'll admit I was skeptical. I've tested dozens of "complete sets"…

I tested hundreds of wedges over the years, from $400 tour-issued Vokeys to box store specials that cost less than…

PXG just built their fastest driver ever. And somehow, it's also their most forgiving. That's not supposed to happen; speed…

PXG is the same company that charges $400+ for a single iron, and now they want to compete in the…

The PXG Black Ops Ultra Lite weighs in at just 277 grams total, which is about 30 grams lighter than…

The PXG initially burst onto the scene with its military-grade marketing and eye-watering price tags. I rolled my eyes harder…

When I pulled the PXG Sugar Daddy II wedge out of its packaging, my initial thought was "another $500 wedge…

The PXG Gen 7 irons clubs have gotten golfers pretty excited lately. If you're wondering whether these irons are worth…

The flashy marketing, the premium pricing, the whole "nobody makes golf clubs the way we do" attitude had me rolling…

PXG Desert Clubs are not your average set of irons. These clubs use something called "hollow body construction," which basically…

I rolled my eyes when PXG announced another "revolutionary" hybrid. After testing over 200 clubs this year alone, I've heard…

I'll admit it, when a buddy handed me a Feruga NPS shaft, I had to Google the brand. Korean? Never…

PXG announced they were making a blade putter with "insert-like feel" and "mallet-like forgiveness." I rolled my eyes. I've tested…

When you strike the ball with the Hellcat ZT, you'll notice something right away: it feels soft but solid. PXG…

PXG designed it Fat Brandon with one main goal in mind. They wanted to create a putter that feels incredibly…

PXG designed this one to stay rock-solid through impact. The "zero torque" part means the clubface won't rotate on you,…

Probably wondering if the PXG Allan putter is worth the hefty price tag, right? Let me walk you through everything…

L.A.B. Golf announced they were releasing a heel-shafted version of their OZ.1i, I rolled my eyes. After spending three years…

When I pulled the OZ.1 out of the box, my initial thought was, "Ultimately, LAB made something that doesn't look…

I never forget the initial time I pulled the MEZZ.1 Max out of its headcover at my local muni. The…

The DF3 looks weird, and that's on purpose. L.A.B. stands for "Lie Angle Balance," which means the putter stays square…

I've tested over 200 putters in the last decade. Scotty Cameron, Bettinardis, Odysseys – you name it, I've probably rolled…

You've seen those futuristic-looking putters that seem straight out of a sci-fi movie, right? Well, the PXG Battle Ready II…
 Pyramid Putter Review
Whenever I hear the maker of a new golf product claim that they can take “X” amount of strokes off…

Top Flite has been around since I can remember (that’s a really long time). As a kid, I remember playing…
 Oban Golf Shafts Review
Oban Golf shafts remain some of the best golf shafts in both graphite and steel that very few talk about. Oban Golf…

I don’t know about you, but if there’s one part of my game that I could stand to improve the…

The flop shot. It’s something you’ve probably tried at some point. The reality is, however, very few golfers are able…

When Payne Stewart out-putted Phil Mickelson down the stretch to claim the 1999 US Open at Pinehurst, there were fewer…

You're likely shanking because you're standing too close to the ball, which exposes the hosel at impact, or you've got…

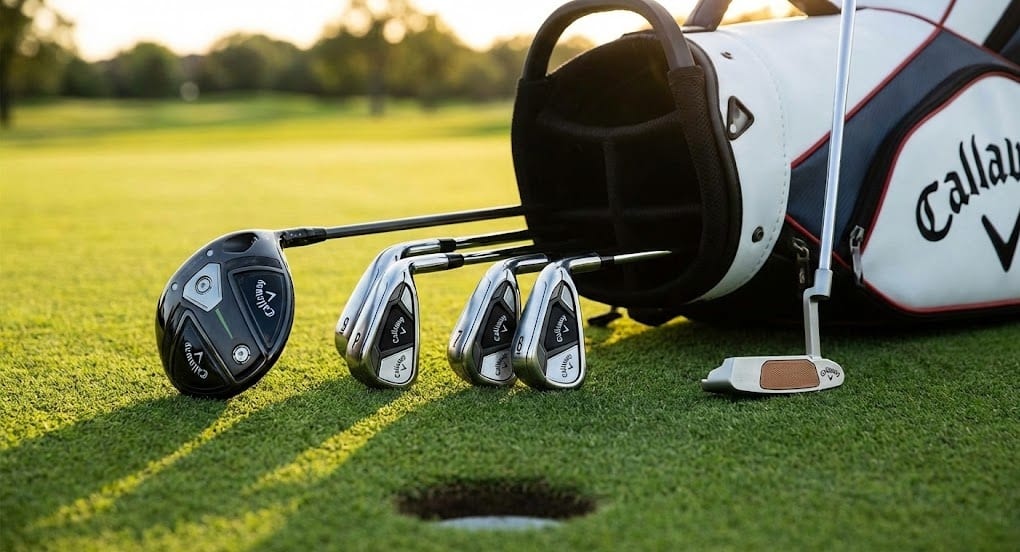
You'll play better golf by honing your skills with 7-10 crucial clubs rather than stuffing your bag with all 14…

You'll want to invest in a hard-shell case with EVA foam padding, since these provide the best protection against baggage…

To stop blading and chunking bunker shots, you need to nail three fundamentals. Initially, position the ball one inch forward…

Most golfers think they hit their 56-degree wedge around 100 yards, but here's the reality check: the average male golfer…

A GW wedge, or gap wedge, fills the loft void between your pitching wedge and sand wedge, typically ranging from…

TaylorMade golf clubs aren't manufactured in a single location; they're built across a global network that might surprise you. Most…

Titleist golf clubs are assembled in Carlsbad, California, but don't let "Made in USA" marketing fool you; the story's more…

You'll need shaft extenders matched to your club material, metal for steel, plastic for graphite, plus high-strength golf epoxy and…

Uniflex shafts adjust to your swing speed, flexing more when you swing slower and stiffening when you swing faster. You're…

If you're a senior golfer watching your drives get shorter and your mishits more punishing, the most forgiving clubs you'll…

Senior flex golf clubs are designed for golfers with swing speeds between 70-85 mph, typically those carrying their driver 180-200…

Fitting golf clubs isn't just picking a shaft stiffness off a chart; it's a data-driven process where a trained fitter…

Forget the generic distance charts manufacturers print; your actual yardages are what matter. You'll use your driver for shots beyond…

The right shaft comes down to your swing speed, tempo, and whether you're prioritizing distance or control. If you swing…

You've got three solid options: ship ahead, check at the airport, or use a professional transfer service. Shipping through specialists…

To pack golf clubs for a flight, you'll need a quality travel bag, a stiff arm to protect your shafts,…

The most popular method is the overlapping grip, where your trailing hand's pinky rests on top of your lead hand's…

You'll find wholesale golf clubs through manufacturer-direct brands like Sub 70 Golf, regional distributors such as J & M Golf…

Your driver probably travels 225 yards, not the 250 you're claiming, and that honest gap exists across every club in…

Forged irons are hammered from solid steel billets, creating a uniform grain structure that delivers superior feel and feedback at…

PXG golf clubs don't come from a single factory; they're assembled from components sourced globally. Your forged iron heads likely…

PING golf clubs are manufactured primarily at their 50-acre Phoenix, Arizona facility, where they've stubbornly kept production domestic since the…

The biggest difference between Srixon's Q-Star Tour and Z-Star comes down to compression, 74 versus 88, and your swing speed…

An A wedge, also called a gap wedge or approach wedge, sits between your pitching wedge and sand wedge, typically…

Mizuno forges all its Grain Flow Forged iron heads at a single facility in Hiroshima, Japan. They've been doing it…
You'll find Callaway golf clubs manufactured across a global network, not a single factory. The majority of club assembly happens…

To measure your golf clubs correctly, you'll need to ditch the tape measure and use the USGA's ground plane method.…

Forget expensive specialty products; white vinegar is your best weapon against rusty golf clubs. Submerge the clubhead in undiluted vinegar…

The biggest mistake I see with hybrids is treating them like fairway woods. You shouldn't sweep them; hit down on…
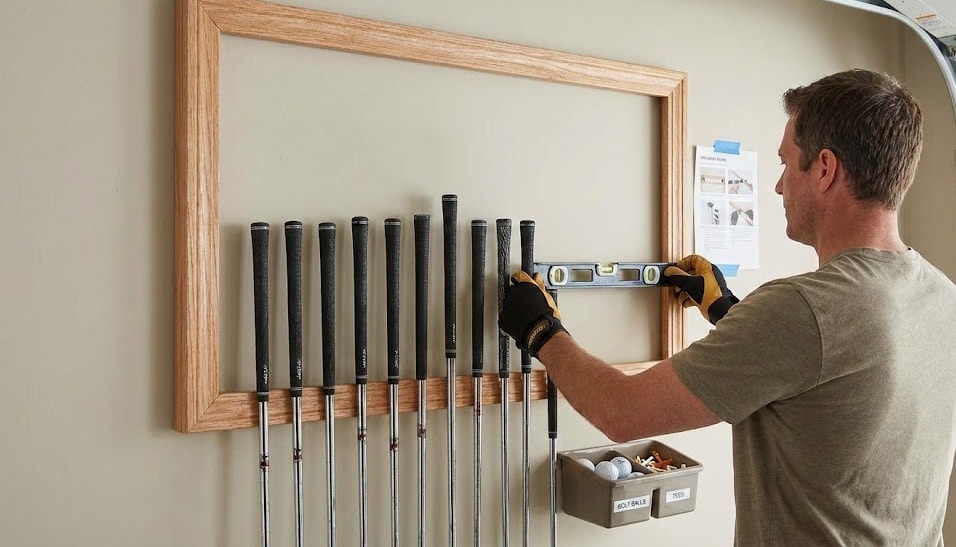
To hang golf clubs on a wall, you'll need a sturdy rack system, appropriate anchors for your wall type, and…
Flying golf clubs typically costs $30 to $60 on major airlines, but here's what most golfers miss: Southwest doesn't charge…

You'll spend anywhere from $1,200 to $5,000+ for a full custom set, but that massive range depends entirely on your…

You're allowed exactly 14 clubs in your golf bag during any round of golf. That's the official rule set by…

Your golf clubs last longer than manufacturers want you to believe. Drivers typically perform well for 3-5 years, irons hold…

To cut a graphite golf shaft, you'll wrap masking tape around your marked cut line, secure the shaft in a…

You'll reach for your sand wedge far more often than just bunker escapes. This club shines on approach shots from…

Bounce is the angle between your wedge's leading edge and the lowest point of the sole, measured in degrees. It's…

To hit a wedge consistently, you'll need to nail the setup initially: position the ball center or slightly back, load…

Golf irons work through a simple physics equation: the loft angle on the clubface launches your ball at a specific…

The fundamental difference comes down to attack angle: you'll sweep your woods with the clubhead traveling upward at impact, while…

Golf irons and woods serve fundamentally different purposes in your bag. Woods deliver maximum distance with their large, hollow titanium…

The choice between cavity backs and blades isn't about marketing; it's about your strike consistency. Cavity backs redistribute weight to…

Takomo golf clubs are designed and quality-controlled in Turku, Finland, but manufactured across Southeast Asia. The components come from Taiwan,…

Hybrid golf clubs blend the distance of fairway woods with iron-like control, and they've earned their spot in most bags…

To buff your golf clubs properly, you'll need three separate buffing wheels and a progression of compounds, emery for deep…

The real difference comes down to your swing speed and where you're hitting from. If you swing above 100 mph…

To clean your golf grips, fill a bucket with warm water and mild dish soap, then scrub each grip with…

To regrip your golf clubs, you'll secure the club in a vise, remove the old grip with solvent, clean the…

You've heard the marketing pitch that hybrids are miracle clubs, but here's the real story: Hybrids give you 8 to…

To clean your golf irons, fill a bucket with warm water and a few drops of dish soap, then soak…

To hit irons consistently, you'll need to abandon the myth that you should watch the back of the ball; instead,…

To grip your irons properly, place the club in the base of your fingers, not your palm, with your lead…

The best driver shaft for you depends on your swing speed: under 85 mph needs regular flex with higher torque,…

You've got four solid options: local PGA professionals who prioritize your swing over sales quotas, big-box retailers like Golf Galaxy…

You'll find quality used golf clubs at national retailers like PGA Superstore and Global Golf, which grade and inspect their…

Forget the marketing hype about "game-improvement technology", choosing golf clubs comes down to three factors: your swing speed, your skill…

Use hybrids whenever you're facing a shot over 180 yards, especially from thick rough, uneven lies, or when you need…

Forget memorizing distance charts; club selection comes down to matching your equipment to real conditions. Use your driver on wide…

The biggest myth in golf is that you need to "develop your swing" before getting fitted; that's backwards thinking that…

You'll see the biggest wave of new golf clubs drop every January, timed around the PGA Merchandise Show in Orlando.…

The biggest differences between women's and men's golf clubs come down to five key specs: women's clubs are about an…

Don't just toss your old clubs in the garage; you've got options that range from cold hard cash to a…

If you're 5'2", you'll need clubs roughly 1 to 1.5 inches shorter than standard women's lengths, think a 43-inch driver…

Offset golf clubs feature a clubface positioned slightly behind the hosel's leading edge, giving your hands extra milliseconds to square…

Modern golf clubs are made from titanium or stainless steel for club heads, graphite or steel for shafts, and rubber…

Here's the straight answer: if your driver swing speed falls between 85-95 mph, you need regular flex; speeds of 95-105…

Hybrid and rescue clubs are the exact same thing; TaylorMade simply trademarked "rescue" in 2003 as a marketing term, and…

The real difference between graphite and steel shafts comes down to your swing speed and physical needs, not marketing claims.…

To determine your ideal golf shaft flex, forget the manufacturer's letter labels—they're inconsistent across brands. Instead, focus on your swing…

There's no single "pro putter" you can buy to fix your stroke; tour players use everything from Scotty Cameron blades…

Milled putters give you that firm, precise feedback that tells you exactly where you made contact, while insert putters offer…

The blade vs. mallet debate isn't about which putter is superior; it's about matching engineering to your stroke. If you've…

The blade vs. mallet debate isn't about which putter is superior; it's about matching engineering to your stroke. If you've…

Bounce is the angle between your club's leading edge and the lowest point of the sole, and it's the single…

Your ideal putter length depends on your height, but it's not as simple as you'd think. If you're between 5'6"…

You'll find the best used golf clubs at specialty retailers like 2nd Swing (115,000+ clubs) and CallawayGolfPreowned.com, which offers 15-day…

You'll want to carry a driver for maximum tee distance, a 3-wood and 5-wood for fairway versatility, plus a 4-hybrid…

Single length irons use identical 37-inch shafts across your entire set, while standard irons feature progressively shorter shafts from 4-iron…

Start with a neutral grip where you can see 2½ knuckles on your left hand, then position your feet shoulder-width…

Choose regular flex if you swing between 85-95 mph – it'll give you higher launch angles and better distance through…

You'll need a sharp utility knife, double-sided grip tape, grip solvent, and a sturdy vise to regrip your clubs properly.…

Start by placing the club diagonally across your left hand's fingers, not your palm, with your thumb slightly right of…

To hit your driver straight and long, position the ball just inside your lead heel and maintain a neutral grip…

You can gain 20-30 extra yards by fixing three key areas: your grip, swing mechanics, and equipment. Start by loosening…

To hit solid hybrid shots, position the ball just inside your lead heel and maintain a shoulder-width stance for stability.…

Choosing the right driver starts with knowing your swing speed—divide your average carry distance by 2.3 for a quick estimate.…

Your golf club's lie angle is the measurement between the shaft and ground when the clubhead sits flat, and it's…

Choosing the right golf shaft can add 10-15 yards to your shots, but most golfers play with wrong specs. You'll…

Your golf clubs' lifespan varies dramatically depending on the type you're using. Putters can last 15-20 years since they take…

You'll want to start by understanding your swing speed and skill level, then choose between forgiving cavity-back irons (perfect for…

You'll want to choose your hybrid based on your swing speed and skill level—higher handicappers should look for 22-25° lofts…

You'll find that golf club names have fascinating Scottish roots, with traditional terms like "niblick" (your modern 9-iron), "mashie" (5-iron),…

Your golf club distances vary dramatically based on your skill level, with high handicappers averaging 177-195 yards with their driver…

You'll want to match your putter type to your natural stroke style for better performance on the greens. If you…

You'll want to choose fairway woods based on your skill level and typical shot needs. Beginners should start with higher-lofted…

Your 5-iron distance depends heavily on your skill level and gender. High handicap men typically hit 130-140 yards, while women…

Approach wedges typically feature lofts between 50-54 degrees, filling that frustrating gap between your pitching wedge and sand wedge. You'll…

Your 7-wood distance depends on your skill level and swing speed, with most golfers hitting it between 145-225 yards. If…

Your golf clubs twist because you're gripping too tightly, hitting off-center, or your swing mechanics are creating unwanted torque. Keep…

You'll find that Southern California Design Company (SCDC), based in Carlsbad, California, secretly manufactures Kirkland Signature wedges for Costco—a fact…

You'll find several major golf club brands still making clubs in America! Cleveland Golf assembles their popular wedges in California,…

You'll need four main wedge types to excel in every short game situation. Your pitching wedge (43-48°) handles 110-130 yard…

I've spent years helping golfers unlock their full potential, and I can tell you that professional club fitting is the…
I've tested a lot of putters over the years. Scottys, Odysseys, Pings, Bettenardis, you name it, I've probably rolled a…
If you've ever stood over a pitch shot and felt like your wedge was working against you, the ball jumping…
But after spending several weeks putting the 0311 P Gen 8 irons through their paces, and getting my hands on…
I've tested a lot of putters over the years, blades, mallets, half-mallets, face-balanced, toe-hang, you name it. And if there's…
If you've been paying attention to the putter world over the last few years, you've probably noticed something: LAB Golf…
I'll be straight with you, when a wedge lands on my desk from a brand that most weekend golfers have…
You're likely shanking because you're standing too close to the ball, which exposes the hosel at impact, or you've got…
You'll play better golf by honing your skills with 7-10 crucial clubs rather than stuffing your bag with all 14…
You'll want to invest in a hard-shell case with EVA foam padding, since these provide the best protection against baggage…
I’ll level with you: Callaway’s latest drop met my standard eye-roll. A decade of testing hundreds of clubs has turned…
Callaway announcing another game-improvement iron family? I’ll admit, my initial reaction was a massive eye-roll. How many different ways can…
I've tested enough drivers over the past decade to fill a small warehouse, and I've heard every marketing promise imaginable.…
To stop blading and chunking bunker shots, you need to nail three fundamentals. Initially, position the ball one inch forward…
Most golfers think they hit their 56-degree wedge around 100 yards, but here's the reality check: the average male golfer…
A GW wedge, or gap wedge, fills the loft void between your pitching wedge and sand wedge, typically ranging from…
TaylorMade golf clubs aren't manufactured in a single location; they're built across a global network that might surprise you. Most…
Titleist golf clubs are assembled in Carlsbad, California, but don't let "Made in USA" marketing fool you; the story's more…
You'll need shaft extenders matched to your club material, metal for steel, plastic for graphite, plus high-strength golf epoxy and…
Uniflex shafts adjust to your swing speed, flexing more when you swing slower and stiffening when you swing faster. You're…
If you're a senior golfer watching your drives get shorter and your mishits more punishing, the most forgiving clubs you'll…
Senior flex golf clubs are designed for golfers with swing speeds between 70-85 mph, typically those carrying their driver 180-200…
Fitting golf clubs isn't just picking a shaft stiffness off a chart; it's a data-driven process where a trained fitter…
Forget the generic distance charts manufacturers print; your actual yardages are what matter. You'll use your driver for shots beyond…
The right shaft comes down to your swing speed, tempo, and whether you're prioritizing distance or control. If you swing…
You've got three solid options: ship ahead, check at the airport, or use a professional transfer service. Shipping through specialists…
To pack golf clubs for a flight, you'll need a quality travel bag, a stiff arm to protect your shafts,…
The most popular method is the overlapping grip, where your trailing hand's pinky rests on top of your lead hand's…
You'll find wholesale golf clubs through manufacturer-direct brands like Sub 70 Golf, regional distributors such as J & M Golf…
Your driver probably travels 225 yards, not the 250 you're claiming, and that honest gap exists across every club in…
Forged irons are hammered from solid steel billets, creating a uniform grain structure that delivers superior feel and feedback at…
PXG golf clubs don't come from a single factory; they're assembled from components sourced globally. Your forged iron heads likely…
PING golf clubs are manufactured primarily at their 50-acre Phoenix, Arizona facility, where they've stubbornly kept production domestic since the…
The biggest difference between Srixon's Q-Star Tour and Z-Star comes down to compression, 74 versus 88, and your swing speed…
An A wedge, also called a gap wedge or approach wedge, sits between your pitching wedge and sand wedge, typically…
Mizuno forges all its Grain Flow Forged iron heads at a single facility in Hiroshima, Japan. They've been doing it…
You'll find Callaway golf clubs manufactured across a global network, not a single factory. The majority of club assembly happens…
To measure your golf clubs correctly, you'll need to ditch the tape measure and use the USGA's ground plane method.…
Forget expensive specialty products; white vinegar is your best weapon against rusty golf clubs. Submerge the clubhead in undiluted vinegar…
The biggest mistake I see with hybrids is treating them like fairway woods. You shouldn't sweep them; hit down on…
To hang golf clubs on a wall, you'll need a sturdy rack system, appropriate anchors for your wall type, and…
Flying golf clubs typically costs $30 to $60 on major airlines, but here's what most golfers miss: Southwest doesn't charge…
You'll spend anywhere from $1,200 to $5,000+ for a full custom set, but that massive range depends entirely on your…
You're allowed exactly 14 clubs in your golf bag during any round of golf. That's the official rule set by…
Your golf clubs last longer than manufacturers want you to believe. Drivers typically perform well for 3-5 years, irons hold…
To cut a graphite golf shaft, you'll wrap masking tape around your marked cut line, secure the shaft in a…
You'll reach for your sand wedge far more often than just bunker escapes. This club shines on approach shots from…
Bounce is the angle between your wedge's leading edge and the lowest point of the sole, measured in degrees. It's…
To hit a wedge consistently, you'll need to nail the setup initially: position the ball center or slightly back, load…
Golf irons work through a simple physics equation: the loft angle on the clubface launches your ball at a specific…
The fundamental difference comes down to attack angle: you'll sweep your woods with the clubhead traveling upward at impact, while…
Golf irons and woods serve fundamentally different purposes in your bag. Woods deliver maximum distance with their large, hollow titanium…
The choice between cavity backs and blades isn't about marketing; it's about your strike consistency. Cavity backs redistribute weight to…
Takomo golf clubs are designed and quality-controlled in Turku, Finland, but manufactured across Southeast Asia. The components come from Taiwan,…
Hybrid golf clubs blend the distance of fairway woods with iron-like control, and they've earned their spot in most bags…
To buff your golf clubs properly, you'll need three separate buffing wheels and a progression of compounds, emery for deep…
The real difference comes down to your swing speed and where you're hitting from. If you swing above 100 mph…
To clean your golf grips, fill a bucket with warm water and mild dish soap, then scrub each grip with…
To regrip your golf clubs, you'll secure the club in a vise, remove the old grip with solvent, clean the…
You've heard the marketing pitch that hybrids are miracle clubs, but here's the real story: Hybrids give you 8 to…
To clean your golf irons, fill a bucket with warm water and a few drops of dish soap, then soak…
To hit irons consistently, you'll need to abandon the myth that you should watch the back of the ball; instead,…
To grip your irons properly, place the club in the base of your fingers, not your palm, with your lead…
The best driver shaft for you depends on your swing speed: under 85 mph needs regular flex with higher torque,…
You've got four solid options: local PGA professionals who prioritize your swing over sales quotas, big-box retailers like Golf Galaxy…
You'll find quality used golf clubs at national retailers like PGA Superstore and Global Golf, which grade and inspect their…
Forget the marketing hype about "game-improvement technology", choosing golf clubs comes down to three factors: your swing speed, your skill…
Use hybrids whenever you're facing a shot over 180 yards, especially from thick rough, uneven lies, or when you need…
Forget memorizing distance charts; club selection comes down to matching your equipment to real conditions. Use your driver on wide…
The biggest myth in golf is that you need to "develop your swing" before getting fitted; that's backwards thinking that…
You'll see the biggest wave of new golf clubs drop every January, timed around the PGA Merchandise Show in Orlando.…
The biggest differences between women's and men's golf clubs come down to five key specs: women's clubs are about an…
Don't just toss your old clubs in the garage; you've got options that range from cold hard cash to a…
If you're 5'2", you'll need clubs roughly 1 to 1.5 inches shorter than standard women's lengths, think a 43-inch driver…
Offset golf clubs feature a clubface positioned slightly behind the hosel's leading edge, giving your hands extra milliseconds to square…
Modern golf clubs are made from titanium or stainless steel for club heads, graphite or steel for shafts, and rubber…
Here's the straight answer: if your driver swing speed falls between 85-95 mph, you need regular flex; speeds of 95-105…
Hybrid and rescue clubs are the exact same thing; TaylorMade simply trademarked "rescue" in 2003 as a marketing term, and…
The real difference between graphite and steel shafts comes down to your swing speed and physical needs, not marketing claims.…
To determine your ideal golf shaft flex, forget the manufacturer's letter labels—they're inconsistent across brands. Instead, focus on your swing…
There's no single "pro putter" you can buy to fix your stroke; tour players use everything from Scotty Cameron blades…
Milled putters give you that firm, precise feedback that tells you exactly where you made contact, while insert putters offer…
The blade vs. mallet debate isn't about which putter is superior; it's about matching engineering to your stroke. If you've…
The blade vs. mallet debate isn't about which putter is superior; it's about matching engineering to your stroke. If you've…
Bounce is the angle between your club's leading edge and the lowest point of the sole, and it's the single…
When Titleist announced they was launching the TSR driver lineup, I'll admit I rolled my eyes a bit. Another year,…
It took roughly 40 rounds and three months of testing to change my mind, but the Titleist TSR3 is the…
When TaylorMade announced the 10k MOI milestone, I rolled my eyes. I expected hype, not performance. But after three weeks…
I approached TaylorMade's announcement regarding the 10,000 MOI barrier with skepticism, dismissing it as typical marketing hyperbole. However, after extensive…
I approached TaylorMade's announcement regarding the 10,000 MOI barrier with skepticism, dismissing it as typical marketing hyperbole. However, after extensive…
I must confess that I was initially skeptical of TaylorMade’s claim regarding the 10,000 g/cm² MOI on the Qi10 Max,…
Skeptical about 'magic' cures for your slice? So was I. But after ten years of testing gear, the Ping G430…
With over two decades of experience on the course, I’ve always held a healthy skepticism regarding the low-spin driver category.…
I wasn't looking for an upgrade. My G425 Max had served me well for two seasons, and I was perfectly…
Mizuno irons have been my go-to for years, but I admit I’ve been missing out on their wedges. That changed…
I've always been a bit skeptical of PXG. The aggressive marketing, the premium pricing, the bold claims. But after spending…
I'll be straightforward with you. I've tested more drivers than I can count over the past decade, and most of…
First off, you'll notice the Cobra DarkSpeed Max Driver looks different from what Cobra's done before. They've gone with a…
The Callaway Paradym driver has some interesting things going on. You know how most drivers feel like you're swinging a…
Let me tell you about the Callaway AI Smoke Max D Driver, and trust me, this club has some interesting…
I was getting tired of the AI marketing hype in golf equipment. Every manufacturer seemed to be slapping "AI" on…
The Newport 2.5 felt different right away. A blade putter is basically the classic, simple putter shape, think of a…
After testing dozens of sets from the big names like Callaway, TaylorMade, and Titleist, I figured these newer companies were…
I've been playing golf for over two decades, and I thought I'd seen every "groundbreaking" fairway wood claim imaginable. So…
Performance Golf uses what they call "Dual Roll Technology," which basically means the face has two different curves built into…
When the Callaway Strata set arrived at my door, I'll admit I was skeptical. I've tested dozens of "complete sets"…
I tested hundreds of wedges over the years, from $400 tour-issued Vokeys to box store specials that cost less than…
PXG just built their fastest driver ever. And somehow, it's also their most forgiving. That's not supposed to happen; speed…
PXG is the same company that charges $400+ for a single iron, and now they want to compete in the…
The PXG Black Ops Ultra Lite weighs in at just 277 grams total, which is about 30 grams lighter than…
The PXG initially burst onto the scene with its military-grade marketing and eye-watering price tags. I rolled my eyes harder…
When I pulled the PXG Sugar Daddy II wedge out of its packaging, my initial thought was "another $500 wedge…
The PXG Gen 7 irons clubs have gotten golfers pretty excited lately. If you're wondering whether these irons are worth…
The flashy marketing, the premium pricing, the whole "nobody makes golf clubs the way we do" attitude had me rolling…
PXG Desert Clubs are not your average set of irons. These clubs use something called "hollow body construction," which basically…
I rolled my eyes when PXG announced another "revolutionary" hybrid. After testing over 200 clubs this year alone, I've heard…
I'll admit it, when a buddy handed me a Feruga NPS shaft, I had to Google the brand. Korean? Never…
PXG announced they were making a blade putter with "insert-like feel" and "mallet-like forgiveness." I rolled my eyes. I've tested…
When you strike the ball with the Hellcat ZT, you'll notice something right away: it feels soft but solid. PXG…
PXG designed it Fat Brandon with one main goal in mind. They wanted to create a putter that feels incredibly…
PXG designed this one to stay rock-solid through impact. The "zero torque" part means the clubface won't rotate on you,…
Probably wondering if the PXG Allan putter is worth the hefty price tag, right? Let me walk you through everything…
L.A.B. Golf announced they were releasing a heel-shafted version of their OZ.1i, I rolled my eyes. After spending three years…
When I pulled the OZ.1 out of the box, my initial thought was, "Ultimately, LAB made something that doesn't look…
I never forget the initial time I pulled the MEZZ.1 Max out of its headcover at my local muni. The…
The DF3 looks weird, and that's on purpose. L.A.B. stands for "Lie Angle Balance," which means the putter stays square…
I've tested over 200 putters in the last decade. Scotty Cameron, Bettinardis, Odysseys – you name it, I've probably rolled…
You've seen those futuristic-looking putters that seem straight out of a sci-fi movie, right? Well, the PXG Battle Ready II…
Your ideal putter length depends on your height, but it's not as simple as you'd think. If you're between 5'6"…
You'll find the best used golf clubs at specialty retailers like 2nd Swing (115,000+ clubs) and CallawayGolfPreowned.com, which offers 15-day…
Pyramid Putter ReviewWhenever I hear the maker of a new golf product claim that they can take “X” amount of strokes off…
Top Flite has been around since I can remember (that’s a really long time). As a kid, I remember playing…
Oban Golf Shafts ReviewOban Golf shafts remain some of the best golf shafts in both graphite and steel that very few talk about. Oban Golf…
You'll want to carry a driver for maximum tee distance, a 3-wood and 5-wood for fairway versatility, plus a 4-hybrid…
I don’t know about you, but if there’s one part of my game that I could stand to improve the…
Single length irons use identical 37-inch shafts across your entire set, while standard irons feature progressively shorter shafts from 4-iron…
Start with a neutral grip where you can see 2½ knuckles on your left hand, then position your feet shoulder-width…
Choose regular flex if you swing between 85-95 mph – it'll give you higher launch angles and better distance through…
You'll need a sharp utility knife, double-sided grip tape, grip solvent, and a sturdy vise to regrip your clubs properly.…
Start by placing the club diagonally across your left hand's fingers, not your palm, with your thumb slightly right of…
To hit your driver straight and long, position the ball just inside your lead heel and maintain a neutral grip…
You can gain 20-30 extra yards by fixing three key areas: your grip, swing mechanics, and equipment. Start by loosening…
To hit solid hybrid shots, position the ball just inside your lead heel and maintain a shoulder-width stance for stability.…
Choosing the right driver starts with knowing your swing speed—divide your average carry distance by 2.3 for a quick estimate.…
Your golf club's lie angle is the measurement between the shaft and ground when the clubhead sits flat, and it's…
Choosing the right golf shaft can add 10-15 yards to your shots, but most golfers play with wrong specs. You'll…
Your golf clubs' lifespan varies dramatically depending on the type you're using. Putters can last 15-20 years since they take…
You'll want to start by understanding your swing speed and skill level, then choose between forgiving cavity-back irons (perfect for…
You'll want to choose your hybrid based on your swing speed and skill level—higher handicappers should look for 22-25° lofts…
You'll find that golf club names have fascinating Scottish roots, with traditional terms like "niblick" (your modern 9-iron), "mashie" (5-iron),…
Your golf club distances vary dramatically based on your skill level, with high handicappers averaging 177-195 yards with their driver…
You'll want to match your putter type to your natural stroke style for better performance on the greens. If you…
You'll want to choose fairway woods based on your skill level and typical shot needs. Beginners should start with higher-lofted…
Your 5-iron distance depends heavily on your skill level and gender. High handicap men typically hit 130-140 yards, while women…
Approach wedges typically feature lofts between 50-54 degrees, filling that frustrating gap between your pitching wedge and sand wedge. You'll…
Your 7-wood distance depends on your skill level and swing speed, with most golfers hitting it between 145-225 yards. If…
The flop shot. It’s something you’ve probably tried at some point. The reality is, however, very few golfers are able…
When Payne Stewart out-putted Phil Mickelson down the stretch to claim the 1999 US Open at Pinehurst, there were fewer…
Your golf clubs twist because you're gripping too tightly, hitting off-center, or your swing mechanics are creating unwanted torque. Keep…
You'll find that Southern California Design Company (SCDC), based in Carlsbad, California, secretly manufactures Kirkland Signature wedges for Costco—a fact…
You'll find several major golf club brands still making clubs in America! Cleveland Golf assembles their popular wedges in California,…
You'll need four main wedge types to excel in every short game situation. Your pitching wedge (43-48°) handles 110-130 yard…
I've spent years helping golfers unlock their full potential, and I can tell you that professional club fitting is the…