To cut a graphite golf shaft, you'll wrap masking tape around your marked cut line, secure the shaft in a rubber-lined vise, and use a tungsten carbide hacksaw blade or Dremel with gentle, consistent pressure. Rotate the shaft during cutting to distribute stress evenly across the fibers, cut halfway through, rotate 90 degrees, then finish. Always wear a dust mask since graphite particles are no joke. The technique details below prevent costly mistakes.
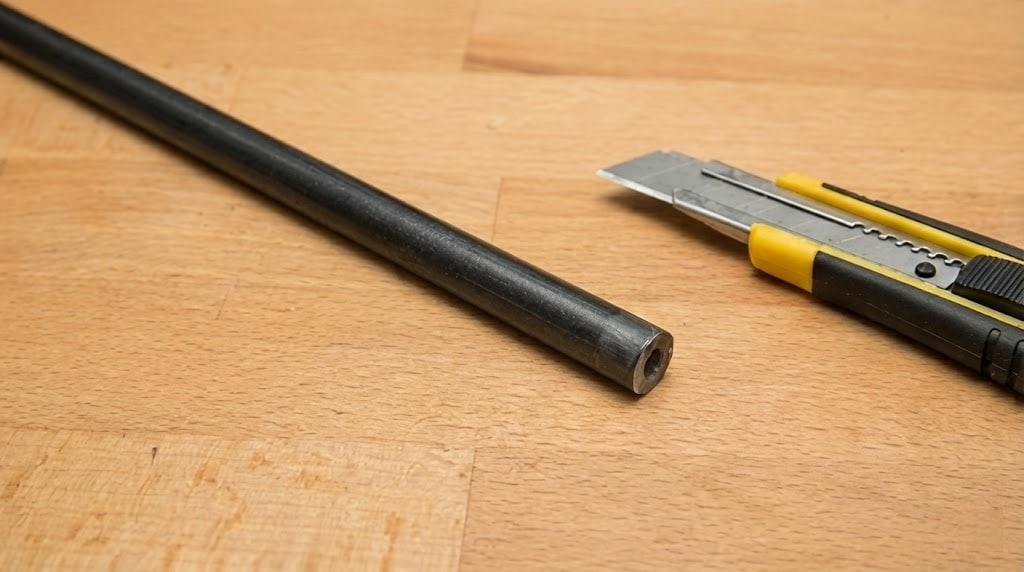
The biggest myth in DIY club building is that you need a $500 professional shaft cutter to get clean results on graphite. You don't. A tungsten carbide rod saw blade, costing around $8, fits your standard 12-inch hacksaw frame and slices through graphite in 15-20 seconds without splintering. The blade's toothless design with tungsten carbide particles enables cutting on both push and pull strokes.
For power tool enthusiasts, a Dremel rotary tool with a fine-tooth cutting wheel handles detailed work beautifully. Cut-off saws work too, but you'll need graphite-specific blades to prevent fraying.
If you're building clubs regularly, consider a dedicated shaft cutter from GolfMechanix or Mitchell Golf. These machines offer dust containment and precision cutting scales that justify their cost over time. But for occasional builds? That rod saw blade delivers professional results at hobby prices. Beyond cutting tools, you'll need essential equipment, including a vise with protective rubber clamps, masking tape to prevent splintering, measuring tape, and sandpaper in medium and fine grits to smooth the cut edges. Working with graphite requires extra care since the layered carbon fiber construction that gives these shafts their lightweight flexibility also makes them prone to fraying if cut improperly.

Before you make that initial cut, the preparation work determines whether you'll end up with a clean, professional edge or a frayed, splintered mess that weakens your shaft.
Start by measuring twice, actually, measure three times. Mark your cutting line with a fine permanent marker, then wrap masking tape around the shaft at that exact spot. This tape isn't optional; it holds graphite fibers in place during cutting and prevents splintering.
Secure the shaft in a proper clamp or padded vise. Don't overtighten; graphite crushes under excessive pressure, creating invisible micro-fractures that'll haunt you later. Sand away any paint near the cut line with fine-grit sandpaper, then wipe clean with acetone. Removing paint properly also helps prevent ferrule creep when you install the ferrule later. Keep in mind that graphite driver shafts are preferred over steel because of their lighter weight, so preserving the shaft's structural integrity during cutting is essential for maintaining optimal performance. Ultimately, inspect for existing cracks and verify your blade's sharpness. Dull blades cause disasters. Work in a well-ventilated area to avoid inhaling harmful graphite dust particles released during the cutting process.
Five distinct cutting methods exist for graphite shafts, and I've tested every single one of them. Some produce clean, professional results, while others leave you with a frayed mess that'll cost you a new shaft.
Here's the technique that actually works: wrap masking tape around your marked cutting point, secure the shaft in a rubber-lined vise, and grab a grit-edge blade or rod saw. Start your cut with gentle, consistent pressure; don't force it. The critical move most DIYers skip? Rotate the shaft continuously as you cut. This distributes stress evenly across the graphite fibers instead of crushing them on one side.
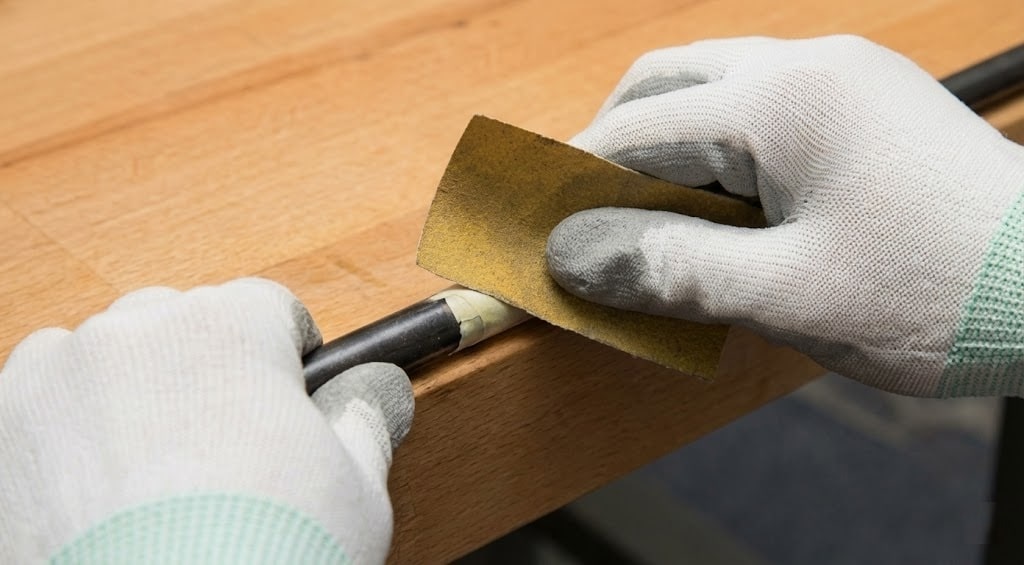
For bulletproof results, cut halfway through, rotate the shaft 90 degrees, then finish. You'll get a clean edge every time. Always wear protective eyewear during the cutting process to shield your eyes from graphite particles and debris. Once you've made your cut, lightly sand the tip from the tape line down using 150-grit or finer sandpaper to remove the polyurethane finish and prepare the surface for epoxy adhesion. Similar to how tour professionals use medium-grit sandpaper to restore golf grips by exposing fresh material underneath, this sanding step creates an optimal bonding surface for your new clubhead.
Carelessness around graphite dust has sent more DIYers to the doctor than botched cuts ever have, and I've seen guys treat shaft trimming like they're whittling a stick in the backyard. That's a mistake. Graphite particles are fine, abrasive, and irritate your lungs and eyes fast.
You need safety goggles, cut-resistant gloves, and a dust mask, no exceptions. Work in a well-ventilated area and position a vacuum near your cutting site to capture airborne particles. Safety glasses are essential to protect your eyes from graphite splinters and debris that can fly unexpectedly during the cutting process.
After you've made your cut, don't just blow the dust away. Use a soft brush or vacuum to clean your workspace thoroughly. Sand the cut edge with fine-grit paper to eliminate splinters, then wash your hands completely. Dispose of graphite dust according to local guidelines for fine particulates. Since factors like shaft weight and kick point affect performance, keeping your workspace clean ensures no debris interferes with your final assembly or fitting measurements.
Even when you've got the right tools and safety gear, a single careless moment can turn a perfectly good graphite shaft into expensive garbage.
The biggest mistake I see? Grab a manual pipe cutter. It'll mangle graphite instantly, leaving you with a frayed, cracked mess. You need a hacksaw or an electric saw with the correct blade, and that blade better be sharp. Using the wrong cutting method produces an unusable butt end that ruins the entire shaft.
Don't skip the tape. Wrapping masking tape around your cut line prevents those graphite layers from peeling and splintering. It's a thirty-second step that saves your shaft. Since graphite shafts are a premium customization option that can significantly increase club costs, protecting your investment with proper technique is essential.
Measure twice, cut once isn't cliché; it's mandatory. Account for blade width, double-check your mark, and clamp the shaft securely before you start. Movement during cutting guarantees an angled, unusable result. When making your cut, allow for an extra 1/32 inch to ensure you don't end up with a shaft that's too short. Ultimately, always deburr that cut edge.
Cutting from the butt end barely changes flex; we're talking negligible stiffness increases that won't alter your shot. Tip trimming? That's a different story entirely. It noticeably stiffens the shaft, and manufacturers provide specific trim charts for this reason. Your real concern isn't flex, it's swing weight. You'll lose roughly 6 points per inch cut, which you'll actually feel. That's the adjustment demanding your attention.
Yes, you can extend a graphite shaft after cutting it too short using a graphite shaft extension. You'll insert a nylon/carbon fiber extension into the butt end, secured with high-strength epoxy. The catch? Don't exceed 2 inches; any longer and you'll compromise shaft integrity and mess with your club's balance. Sand both surfaces, let the epoxy cure for 24 hours, then regrip.
Longer shafts increase swing weight, roughly 3 points per half-inch, making the clubhead feel heavier and shifting your balance point toward the head. You'll generate more potential power and a higher launch angle, but you're also sacrificing control. Shorter shafts drop swing weight, giving you faster swing speeds and tighter dispersion, though you'll lose some distance. The real question isn't length alone, it's finding the swing weight that matches your tempo and strength.
Cut from the tip end. This is the standard method manufacturers recommend, and for good reason, it properly adjusts flex to match your setup. Butt cutting preserves flex but limits you to about one inch before you're messing with swing weight and balance. Here's the real deal: tip trimming gives you control over both length and stiffness, making it the smarter, more versatile choice for most builds.
Forget the oversimplified height charts; they're a starting point, not gospel. You'll get far more accurate results using the wrist-to-floor method. Stand straight, arms relaxed, and measure from your wrist crease to the ground. If you're between 5'7" and 6'1", standard lengths typically work. Under 5'7"? Go shorter. Over 6'1"? You'll likely need extensions. This measurement beats height alone every time.
Cutting a graphite shaft isn't rocket science, but it demands respect. You've now got the knowledge to do this right, proper tools, measured cuts, and smart safety practices. Skip the expensive club fitting fees when you're confident in your measurements. Just remember: measure twice, cut once. That old saying exists because graphite doesn't forgive mistakes. Take your time, and you'll nail it.